This tutorial is completely my own and any similarity is just pure coincidence...
Supplies Needed:
I use PSP X6
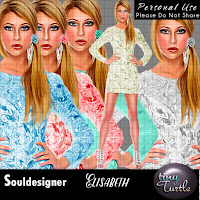
Tube of Choice, Im using in this one,Elisabeth by Soul Designer, which you can purchase HERE at Tiny Turtle Designs Store.
Supplies Needed:
I use PSP X6
Tube of Choice, Im using in this one,Elisabeth by Soul Designer, which you can purchase HERE at Tiny Turtle Designs Store.


Font of Choice I used Angelface, which I got as a free font, HERE
Mask: Rocked By Rachel Mask Set 68 - Mask 3 which you can get HERE
Ok Lets get Started...
Open Up a new image, 900 x 900 (this tends to work better when using more elements)
It will look big but you will resize later...
Now choose
Frame 66
and place it in your new image.
Place it a bit to the left so you can place your tube to the right and have her stand in front of it but you can still see whats inside the frame.
Next Choose the clothes you want for Elisabeth ( or other tube) I chose the white/silver with the pink rose in her hair. Place her in your image. Resize her by 50% and place her to the right of the frame. Next drag her again to your new image (dont duplicate, just drag her over again,like before) resize her by 125% and place her behind the frame and position her so you can see as much as her face as possible.
Now take your magic wand and click inside the frame. Go to modify under selections, expand and expand by 25, then invert and click to your tube and click delete on your keyboard.
Next take Paper 2 and repeat with the magic wand.
Now click on your tube layer and go up to layer properties and choose SCREEN leave it at 100% opacity.
Now we are ready for the elements.
For this tag I chose
I chose
Elements:
11, 21, 26, 32, 62, 71, & 72
Take element 62 and place it under element 11 and off to the right.
Now take element 71, resize by 50% and place it on the very bottom layer at the top left, see tag for example.
Take 72 and resize by 75% and place on layer just below top tube and position bottom left of the frame and element 11.
Now take element 21 and place just above element 62(clock) layer, and place top left corner. Duplicate, flip horizontally and place in top right corner as desired.
Place element 26 just behind element 21.
Now take element 32 resize by 50% and place just above frame layer and place on top left corner.
Now take paper 12 and place on very bottom layer and choose a mask to your liking.
Add mask and merge group, and adjust size as needed. I have used Rocked By Rachel's Mask Set 68- Mask 3
Almost done....
Merge visible , Re-size to your liking (I like 600x600) then add the artist and your copyrights :) and choose your desired font,
for this I used, Angelface, with a black outline and pink from the frame filler.
Merge visible , Re-size to your liking (I like 600x600) then add the artist and your copyrights :) and choose your desired font,
for this I used, Angelface, with a black outline and pink from the frame filler.
Adjust size as desired.


No comments:
Post a Comment