This tutorial is completely my own and any similarity is just pure coincidence...
Supplies Needed:
I use PSP X6
Tube of Choice, Im using in this one, Misty by Lady Mishka, which you can purchase
HERE at Tiny Turtle Designs Store.
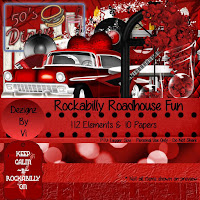
Scrap Kit: Rockabilly Roadhouse Fun By Designs By Vi which you can purchase
HERE
Font of Choice I used Rockabilly, which I got as a free font,
HERE
Ok Lets get Started...
Open Up a new image, 975 x 975 (this tends to work better when using more elements)
It will look big but you will resize later...
Now choose
Element 109
and place it in your new image.
Next place Misty into your image and have her directly in front of the frame, most of her covering the left side with her legs resting on the right side.
Now take the close up of Misty and place her behind the frame. make her as centered as possible. Adjust as desired.
Take paper 10 and place behind misty, now take your magic wand, click inside the circle of the frame and modify by
10, then invert, and click on your paper, then click the delete button
on your keyboard. Repeat with your close up layer of Misty.
Now Select none and staying on Misty close up, click on effects, artistic effects, then half tone.
Cell properties:
Haft tone patter= Round
size= 2
Color Scheme = RGB
Screen Angles=
1- 108 2-162 3-90
Blend=
Use as overlay
Screen @ 75% opacity
Now lets add some elements...
Take Elements:
44, 64, 69 and 86
Start with 44 and place it on your bottom layer, resize by 75% and position it left center then duplicate and place that one on the right side.
Now take 86 and place it just below your top Misty layer, resize by 75% and position on the bottom right.
See tag for example.
Next we will take element 69 and place it just above the car layer (element 86)
resize this by 75% and place on bottom right.
Now carefully erase the words "say it with music".
After that duplicate it and flip it horizontally placing that one on the left side.
Now place 64 on bottom layer placing top left, duplicate and move to top left.
Pick 14 and 45 now .
Take 14 and place it in your image, on top layer, resize by 25% placing by Misty's hand.
Take 45 resize by 25% as well and place it top center between your music notes.
Pick 84 & 90 now
Take 84, resize by 115% and place on bottom layer and center it. This will give you the illusion of using a mask.
Take 90 resize by 50% , duplicate and place one in top left corner and one in top right corner.
Lastly take 82 and place just below top Misty layer. Resize by 115% and center as desired.
Almost done....
Merge visible , Re-size to your liking (I like 600x600) then add the artist and your copyrights :) and choose your desired font,
for this I used, Rockabilly, in red with a black outline.
Adjust size as desired.


