

This tutorial is completely my own and any similarity is just pure coincidence...
Supplies Needed:
I use PSP X6
Tube of Choice, Im using in this one, Alice Blood by Lady Mishka, which you can purchase HERE at Tiny Turtle Designs Store.
Supplies Needed:
I use PSP X6
Tube of Choice, Im using in this one, Alice Blood by Lady Mishka, which you can purchase HERE at Tiny Turtle Designs Store.

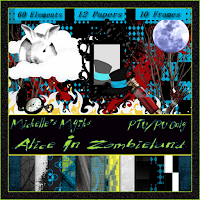
Scrap Kit: Alice In Zombieland which you can purchase HERE
Font of Choice I used Alice In Wonderland, which I got as a free font, HERE

Font of Choice I used Alice In Wonderland, which I got as a free font, HERE
Mask: Rocked By Rachel Mask Zombieland - Mask 4 which you can get HERE
Ok Lets get Started...
Open Up a new image, 975 x 975 (this tends to work better when using more elements)
It will look big but you will resize later...
Now choose
Frame 7
and place it in your new image.
Resize by 125%
Now take paper 2 and place it behind your frame and take your magic wand, click inside the circle of the frame and modify by 10, then invert, and click on your paper, then click the delete button on your keyboard.
Next place 1st Alice in your Image.
I chose the blond one with no blood.
Resize her by 25% she will be huge.
Place her to the right of the frame.
Next take 2nd Alice the black one with blood.
Resize her by 35%
Place her on above your paper layer but under the frame layer.
Flip her horizontally and place as desired, so that shes looking back at the other Alice like her evil reflection.
Next select your paper layer, go to selections, chose select all, float, defloat, then invert. Go back to Dark Alice, and click on that layer, then hit delete on your keyboard.
Now go back to your Light Alice, and go to effects, and choose your 3d drop shadow effect.
Vert. 8
Horiz.0
Opacity. 50
Blur. 7
Now we are ready for elements...
Start with elements Blood Spatter, 1 and 2
Place one on bottom right and one top left.
Now blood spatter 3 and place it bottom left but on top the the frame layer
duplicate and place top right.
See tag for example.
Take element Tree 2 and resize by 150% and place below paper layer but above blood spatter layers.
place on right side behind Light Alice. Duplicate, flip horizontally and place on left side behind Dark Alice.
Now take Tombstone element, resize by 75% and place above tree root on left side. Duplicate... DO NOT FLIP, and place on right side covering the tree roots as best as possible, erase any roots that stick out.
Take Rocks Element and resize by 75% and place in front of tombstones on both side, but place it below the Light Alice layer.
Take element clock 2, resize by 75% and place it in the center of the rocks.
Take element white rabbit 2 and resize by 25% and place him on top of the rocks on the right behind Light Alice.
Now take element house and place it behind the tombstone layer on the left and place it just below the top of the tombstone. Duplicate, flip and mirror on the right side.
Next take element tree 1 and place it just behind the house layer and place it in the center at the top.Duplicate and fill the center with the trees.
Take element Moon and place just behind those trees in the center.
Take both cloud elements and place them just above the moon.
Resize Clouds 1 by 50% do not resize clouds 2.
Take element skull resize by 75% and place it on the rocks on the left.
position as desired.
Take element mushrooms, resize by 25% and place in front of rocks on bottom left.
Now take paper 11 resize by 150% and place on very bottom layer and choose a mask to your liking.
Add mask and merge group, and adjust size as needed. I have used Rocked By Rachel's Mask Zombieland Mask4.
Almost done....
Merge visible , Re-size to your liking (I like 600x600) then add the artist and your copyrights :) and choose your desired font,
for this I used, Alice in Wonderland, in black with a blue glow.
Merge visible , Re-size to your liking (I like 600x600) then add the artist and your copyrights :) and choose your desired font,
for this I used, Alice in Wonderland, in black with a blue glow.
Adjust size as desired.
No comments:
Post a Comment