Showing posts with label PTU Kits By Me. Show all posts

Friday, June 12, 2015

Mellisse By Lysisange Tutorial.


This tutorial is completely my own and any similarity is just pure coincidence...


Supplies Needed:

I use PSP X6

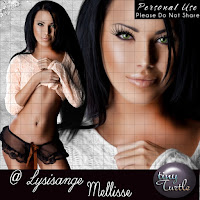
Tube of Choice, Im using in this one,Mellisse By Lysisange, which you can purchase HERE at Tiny Turtle Designs Store.
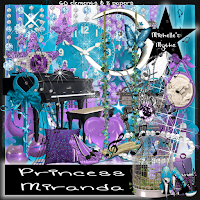
Scrap Kit: Princess Miranda by Michelle's Myths which you can purchase HERE

Font of Choice I used Sacramento, which I got as a free font, HERE


Ok Lets get Started...

Open Up a new image, 900 x 900 (this tends to work better when using more elements)

It will look big but you will resize later...

Now choose
Frame 6
and place it in your new image.

Resize by 125% 
Now place your tube in your image resize by 50% and arrange so tube is on right side and frame on left, see my tag for example. You want your tube over the frame but you also want to be able to see MOST of the 3 squares.

Next take your magic wand tool and click inside each square. 
Expand by 10 and then invert 

Choose your paper to fill frame next.

I chose paper 2, place in image and place on bottom layer. Make sure you are on your paper layer and click delete on your keyboard to remove excess paper. Then select none.

Next duplicate your tube 2 times, place the first one above paper layer, flip it horizontally and place it so that her head is in the top frame and her body is in the frame just below it. See my tag as example. 

Take the next on and place it in the frame just behind your original tube. Arrange her so you can see her face above the original tube's shoulder. 
Go back to your magic wand tool and repeat click inside each square. 
Expand by 10 and then invert. Then click on each tube below the frame and click delete to remove the excess of the tubes. Select None.

Now click on each duplicate tube that you just cut and placed behind the frame. Go to effects and artistic effects, and down to half tone, use settings :
Cell Properties:
Halftone pattern:
Round Size 2
Color scheme RGB
Screen angles :108/162/90
Use as an overlay
blend mode screen - 75%

Use this on both duplicate tube layers.

Now take element 44 and place on bottom layer at the bottom left. 
Duplicate and place on bottom right, arrange to your liking. 

Take element 48 and place just below your original tube layer. and place on the left. This WILL cover some of what you just did, but that's ok that's just the background and yuo can still see part of it.

Take element 15 next and place on top layer and place across your tubes legs. 
Take element 11 and resiz by 25% then place on right above the tubes legs and place it on the right edge. 
See tag for example. 
Place element 24 next, resize by 25% and place behind tube layer and have it peeking out behind her legs and the shoes. 
Now take elements 56 & 57 and place them on the left side just above her legs. 
Resize each element by 35%

Take Element 40 and resize by 25% and place on right side over leg.
What we are doing here is covering up where her legs cut off and making it appear as tho she is standing behind these items. 

Take element 54 rotate it by 45% to the left, then resize by 50%. place behind all items covering her legs but above her legs. Now duplicate, flip horizontally and place on the right side. 

See Tag for example.
Now her legs should be covered where they cut off.

Take element 49 and place it behind the piano layer on the left, but dont cover any of your tube's face. Duplicate, flip Horizontally and place on the right, this one wont show as much, just make sure to not cover your tube's face in the frame. 

Now take element 34 and resize by 175% and place on bottom layer to the right peeking out from behind your tube.

Take element 22 place on last layer of image, place in top left, duplicate, place in top right, merge down, duplicate again and place on bottom. 
Place element 34 just above castle layer and place so it looks like its hanging from the tower. 

Take element 33 and place it just above your last layers, flip it horizontally and arrange to your liking, see tag of example. 

Now take element 5 and resize by 50% and place above frame layer, erase the star that is covering the tube at the top right. 

Last take element 38 resize by 50% and place just above glitter layer and place at the top right. 

Almost done....

Merge visible , Re-size to your liking (I like 600x600) then add the artist and your copyrights :) and choose your desired font,
for this I used, Sacramento , I used the purple from Mellisse's clothes. I added a light white glow. Under layer properties, size 10 glow 80%

Adjust size as desired.


Thursday, June 11, 2015

Captain from Alehandra Vanhek Tutorial.


This tutorial is completely my own and any similarity is just pure coincidence...


Supplies Needed:

I use PSP X6

Tube of Choice, Im using in this one,Captain By Alehandra Vanhek, which you can purchase HERE at Tiny Turtle Designs Store.

Scrap Kit: Pink Beach Party by Michelle's Myths which you can purchase HERE


Font of Choice I used Ocean, which I got as a free font, HERE


Ok Lets get Started...

Open Up a new image, 900 x 900 (this tends to work better when using more elements)

It will look big but you will resize later...

Now choose
Element 16
and place it in your new image.


Next I added Captain,Customize her to your liking and place her in your image.
Place her in front of the frame, re-size if needed.Place her on the right edge of the frame.
Duplicate Captain, and place this layer under frame layer, next go back to top Captain layer and erase her legs so that it looks as tho she is standing in the frame. Her top haft will be on top of the frame.

Now choose your paper, I choose Paper 4. Drag it to you image, and place it on the very bottom layer.
Next click on frame layer, and use the magic wand tool, and click inside the square of the frame.Go up to selections, modify, expand, enter 10 in number of pixles,
go back up to selections and click invert. Now click on paper layer, and go up to edit and chose cut.Now go back up and select NONE.
This will remove all excess paper surrounding the frame.

Next pick out some elements, I chose Element 4, Element 11, Element 54, Element 75, Element  88,
Element 95, Element  102.

Resize you elements to your liking and place them in your image. 
With Element 11, I placed it on the top layer on the left side and then duplicated it 2 times, placing both behind the top Element 11 layer, arranging it so it was 2 different heights, see tag for example. 
Next merge each Element 11 layer down, till the 3 layers become 1. Duplicate, flip horizontal then place on layer just above the frame layer on the right. See tag for example. 
Place Element 4 in front of this layer 
Next place Element 88 in your image, and move it to the very bottom layer and arrange it to your liking on the left, now duplicate and move that layer to the right, so that it looks as if it is the water beneath your pier. 
Now take Element 75 and place it on the layer above your duplicate layer of Element 88, place it on the left and arrange it toward the bottom. Duplicate and move that layer to the right side, giving you a beach. 
Place Element 54 on a layer that is behind your Captain layer, and place in the top left corner.
Take Element 102 and place it in the top right corner. Below Captain layer. 
Now take Element 95 and place it on the layer just below your merged Element 11, on the left side and arrange it as shown along frame.
 Now choose one more paper, I chose Paper 6. Place it on your very bottom layer.Resize so it fills screen.  Pick a mask of your liking. Apply and merge group and resize to your liking, if needed. 
And Lastly choose some seashells to your liking and place them on your beach, scattered about. 

Almost done....

Merge visible , Re-size to your liking (I like 600x600) then add the artist and your copyrights :) and choose your desired font,
for this I used, Ocean , I used the pink from Caption and outlined it in the purple from Captain.
Adjust size as desired.

And save as a PNG so that its transparent...

Wednesday, March 25, 2015

Emily by Swan Scraps

Check out this awesome tube by Swan Scraps, Emily.... She comes with several different colored layers for her clothes and her hair and BUNNY EARS in several colors, as well as a close up with changeable hair...
Stop by PFD and pick her up today!!!!
Get Emily HERE:
 http://picsfordesign.com/en/catalogue/id_117215_emily.pix
Check out more by Swan Scraps below:
 
 
Kits used Bunny Lane and Ostara By Michelle's Myths  

Thursday, March 19, 2015

Jenny By Swan Scraps

This great tube Jenny is by Swan Scraps... She comes in multi layers, many colors to chose from as well as a removable hat, a St. Patrick's layer and removable cherries and clover and Close Up images...
 
You can find her here at PFD :
 
 
Kit used below is Lil Goth Girl by Dance In The Rain:


Kit used below is Luck of the Irish by Michelle's Myths:


Saturday, November 22, 2014

Kateri By Graphfreaks matching kit...

  • This Autumn kit comes with 80 elements and 10 papers...
  • Personal Use Only
  • This kit is a match for Graphfreaks Kateri
  • TUBE SOLD SEPARATELY here:
  • Kateri- Here

You can get this kit here:


Friday, November 7, 2014

Autumn Winds By Wendy G

CT By Michelle's Myths For Wendy G. Graphics
Meet the beautiful Autumn Winds, you can purchase her
at Mystical Scraps here:

Kit Used November by Michelle's Myths available at Scrap Candy &


Now making Kit Matches for Soul Designer....

Check out these kits and stop by PFD to pick up your kit and tube today, link to tube is below kit :)

Kits HERE


Cano Kit Match for Linda 2

You can get Kit and Tube @


New Tony T Kit Match for Ellen By Michelle's Myths

Kit & tube can be purchased @ Tony's store:


New Rac Kit Matches by Michelle's Myths

Both of these new kits can be purchased


Clasic By Roman Zaric ♥

Both tube and kit can be purchased 


Moonlight By Arthur Crowe, Matching kit

Stop by The Arthur Crowe Factory and pick up this amazing tube and matching kit made by Michelle's Myths  :)


Thursday, October 16, 2014

Good Girl By Wendy G. Tutorial


This tutorial is completely my own and any similarity is just pure coincidence...


Supplies Needed:

I use PSP X6

Tube of Choice, Im using in this one, Good Girl by Wendy G., which you can purchase HERE

Scrap Kit: Cemetery Gates By Michelle's Myths which you can purchase HERE


Font of Choice I used Crazy Killer, which I got as a free font...


Ok Lets get Started...

Open Up a new image, 900 x 900 (this tends to work better when using more elements)

It will look big but you will resize later...

Now choose
Frame (8)
and place it in your new image.


Next I added Good Girl2,Customize her to your liking(I chose the full size)and place her in your image.
Place her in front of the frame, re-size if needed.Place her on the left edge of the frame.
Now take the Close Up of Good Girl2 and place her inside the frame.
Now click on frame layer, and use the magic wand tool, and click inside the frame.Go up to selections, modify, expand, enter 10 in number of pixles,
go back up to selections and click invert. Now click on paper layer, and go up to edit and chose cut.Now go back up and select NONE.
This will remove all excess surrounding the frame.

Now take Paper (8) and repeat the same process as you did with the close up of Good Girl2.

Next pick out some more elements, I chose Grass (1), Tombs (23), Trees (4),Moon, Bats(2), Spiders (1),Tomb(24), Fog,

Take Tombs(23),and place it behind your frame after the Paper Layer...
Resize it By 125% and place center/right...

Now take trees(4) and place behind the house on right side,resize by 125%, duplicate and place one in center and to the left.

Take Moon, place it below the last tree layer, and position it on the top right between the two trees...

Now take Grass(1) and place along the bottom of the frame but behind your tube...
Duplicate and stretch out across frame and also house...

Next take Bats (2) and place to the top left just below House layer...
Duplicate, flip horizontal, and place top right... 

Take Spiders(1) and place over frame in the top right corner as if it is draped over the frame.

Take your Tomb(24) and place it on bottom right corner just below the Spiders (1) layer so it looks like
the spiders are comig down on it...

Now choose Fog and place it as the top layers and randomly place it, see tag for placements...

Finally take Paper (3) and place it on the very bottom layer and choose a mask of your choice and load mask...
Resize mask if needed...

Almost done....

Merge visible , Re-size to your liking(I like 600x600)then add the artist and your copyrights :) and choose your desired font,
for this I used,Crazy Killer, which I got as a free font,but sadly do not have the link.. , I used Black outlined in purple.
Adjust size as desired.

And save as a PNG so that its transparent...


Here is the same tag using Good Girl 2 the red one :) 
As you can see both look awesome :) 

Sweater Girl Sexy by Arthur Crowe and matching kit....

Stop by The Arthur Crowe Factory and pick up this amazing tube and matching kit made by Michelle's Myths  :)


Tuesday, October 14, 2014

Lets Play A Game By Graphfreaks Tutorial

 
This tutorial is completely my own and any similarity is just pure coincidence...


Supplies Needed:

I use PSP X6

Tube of Choice, Im using in this one, Lets Play A Game by Graphfreaks., which you can purchase HERE

Scrap Kit: Malice In Wonderland By Michelle's Myths which you can purchase HERE


Font of Choice I used CF Chiller, which I got as a free font,but sadly do not have the link..


Ok Lets get Started...

Open Up a new image, 900 x 900 (this tends to work better when using more elements)

It will look big but you will resize later...

Now choose
MaliceInWonderland_MM (111) (frame)
and place it in your new image.


Next I added Lets Play A Game,Customize her to your liking(I chose the full size)and place her in your image.
Place her in front of the frame, re-size if needed.(I resized her by 150%) Place her on the left edge of the frame.
Now take the Close Up of Lets Play A Game (resize if needed, I resized by 125%) and place her inside the frame.
Now click on frame layer, and use the magic wand tool, and click inside the frame.Go up to selections, modify, expand, enter 10 in number of pixles,
go back up to selections and click invert. Now click on paper layer, and go up to edit and chose cut.Now go back up and select NONE.
This will remove all excess surrounding the frame.

Now take Paper (2) and repeat the same process as you did with the close up of Lets Play A Game.

Next pick out some elements, I chose MaliceInWonderland_MM (5),MaliceInWonderland_MM (7),MaliceInWonderland_MM (8),
MaliceInWonderland_MM (9),MaliceInWonderland_MM (21),MaliceInWonderland_MM (22),MaliceInWonderland_MM MaliceInWonderland_MM (36),
(37),MaliceInWonderland_MM (41),MaliceInWonderland_MM (46),MaliceInWonderland_MM (70),MaliceInWonderland_MM (71),MaliceInWonderland_MM (86),
MaliceInWonderland_MM (19),MaliceInWonderland_MM (20)

Take MaliceInWonderLand_MM (7),MaliceInWonderland_MM (8),MaliceInWonderland_MM (9) and place them under the frame on the very bottom layer.
Place them to look like blood is spattered behind the frame, take (9) and duplicate it and place it in the corner that
is missing one...

Now take MaliceInWonderland_MM (46) and place on the layer just behind your tube and off to the right.
Take MaliceInWonderland_MM (5) &  place it just below (46) but off to the left, See tag for placements.

Now take (37) and place it on right bottom corner on the layer just below the paper layer, it should be just behind
her socks...

Next take (22) and place it just above the frame layer, and position it so it meets the right corner of the house.

Now place (21) on layer above the watch, resize by 125% and place on top rose.

Place (41) on next layer and position beside the watch. But done cover the face of the close up tube.
Next take (36),(70),(71) and place in a cluster on right side, see tag for placements.

Now choose Paper (3) and place it on the very bottom layer, and
choose a mask.
You will need to resize by 125% to make it fit your canvas.  

Finally take (19) & (20) and drape them across the top of your tag on the frame.Erase excess to make it look
as tho its draped acrossed your frame...


Almost done....

Merge visible , Re-size to your liking(I like 600x600)then add the artist and your copyrights :) and choose your desired font,
for this I used,CF Chiller, which I got as a free font,but sadly do not have the link.. , I used red outlined in black.
Adjust size as desired.

And save as a PNG so that its transparent...

Monday, October 13, 2014

Oriya By Graphfreaks Tutorial


This tutorial is completely my own and any similarity is just pure coincidence...


Supplies Needed:

I use PSP X6

Tube of Choice, Im using in this one, Oriya by Graphfreaks., which you can purchase HERE

Scrap Kit: Dearest One By Michelle's Myths which you can purchase HERE


Font of Choice I used CF Zombie Party, which I got as a free font,but sadly do not have the link..


Ok Lets get Started...

Open Up a new image, 900 x 900 (this tends to work better when using more elements)

It will look big but you will resize later...

Now choose
Frame (3)
and place it in your new image.


Next I added Oriya,Customize her to your liking(I chose the full size)and place her in your image.
Place her in front of the frame, re-size if needed.(I resized her by 150%) Place her on the left edge of the frame.
Now take the Close Up of Oriya (resize if needed, I resized by 125%) and place her inside the frame.
Now click on frame layer, and use the magic wand tool, and click inside the frame.Go up to selections, modify, expand, enter 10 in number of pixles,
go back up to selections and click invert. Now click on paper layer, and go up to edit and chose cut.Now go back up and select NONE.
This will remove all excess surrounding the frame.

Now take Paper (5) and repeat the same process as you did with the close up of Oriya.

Next pick out some elements, I chose DearestOne (10),DearestOne (17),DearestOne (34),DearestOne (47),
DearestOne (48)DearestOne (49),DearestOne (51),DearestOne(54),DearestOn(68)

Take DearestOne (68) and place under tube layer on bottom left corner but on top of frame layer.

Next take DearestOne (47),DearestOne (48),DearestOne (49) and place them under the frame on the very bottom layer.
Place them to look like blood is spattered behind the frame, take (49) and duplicate it and place it in the corner that
is missing one...

Now take DearestOne (17) and place on top of the frame behind your tube.Place it on the frame bottom center. 
Take DearestOne (51) &  place it on top of the frame, resize by 50% and arrange to your liking,see tag for placement.

Now take (34) ontop of the the frame.Place it on right top corner and make it look as tho it is draped over the frame.
Take (64) and repeat, only make sure to place (64) Under the layer (34)

Next take (10) and place on bottom left corner, once positioned, pull behind paper layer, but above blood layers.
Duplicate and place this one on the bottom right corner, keeping it behind the frame and paper layers.

Now place (68) over the 1st blood layer and center it at the top.

Finally choose Paper (1) and place it on the very bottom layer, and
choose a mask.
You will need to resize by 125% to make it fit your canvas. 

Almost done....

Merge visible , Re-size to your liking(I like 600x600)then add the artist and your copyrights :) and choose your desired font,
for this I used,CF Zombie Party, which I got as a free font,but sadly do not have the link.. , I used Black outlined in red.
Adjust size as desired.

And save as a PNG so that its transparent...

Sunday, October 12, 2014

Zombie Chick By Wendy G. Tutortial

 This tutorial is completely my own and any similarity is just pure coincidence...


Supplies Needed:

I use PSP X6

Tube of Choice, Im using in this one,Zombie Chick by Wendy G., which you can purchase HERE

Scrap Kit: Zombie Love By Michelle's Myths which you can purchase HERE


Font of Choice I used CF Zombie Party, which I got as a free font,but sadly do not have the link..


Ok Lets get Started...

Open Up a new image, 900 x 900 (this tends to work better when using more elements)

It will look big but you will resize later...

Now choose
Frame (2)
and place it in your new image.


Next I added Zombie Chick,Customize her to your liking(I chose the full size)and place her in your image.
Place her in front of the frame, re-size if needed.Place her on the right edge of the frame.
Now take the Close Up of Zombie Chick and place her inside the frame.
Now click on frame layer, and use the magic wand tool, and click inside the frame.Go up to selections, modify, expand, enter 10 in number of pixles,
go back up to selections and click invert. Now click on paper layer, and go up to edit and chose cut.Now go back up and select NONE.
This will remove all excess surrounding the frame.

Now take Paper (1) and repeat the same process as you did with the close up of Zombie Chick.

Next pick out some elements, I chose ZombieLove_MM (1),ZombieLove_MM (5),ZombieLove_MM (6),ZombieLove_MM (7),
ZombieLove_MM (44)ZombieLove_MM (45),ZombieLove_MM (49),ZombieLove_MM(68),ZombieLove_MM (70),ZombieLove_MM (73),ZombieLove_MM (74),
ZombieLove_MM (82),ZombieLove_MM (86),ZombieLove_MM (89).


Take ZombieLove_MM (5),ZombieLove_MM (6),ZombieLove_MM (7) and place them under the frame on the very bottom layer.
Place them to look like blood is spattered behind the frame, take (7) and duplicate it and place it in the corner that
is missing one...

Now take ZombieLove_MM (1) and place on top of the frame behind your tube.Resize by 25% to fit.
Take ZombieLove_MM (74) &  place it on top of the frame, resize by 75% and arrange to your liking,see tag for placement.

Now take (44) ontop of the blood but under the paper layer behind your frame...

Next take (82) and place on top of (44) layer and position next to the house, see tag for my placements.
Duplicate several times and place randomly to make it look like shes in the woods. See tag for placements if unsure.

Now place (68) over the 1st blood layer and center it at the top.

Take (45),(86), and (89) place over the tube layer and place to look as tho she is standing behind them.(86) will need
resized by 50%.

Take elements, (49) and (73) and place in front of your frame at the bottom. Place (73)on top of your tube
layer behind the other elements to give the effect that she is standing behind them as well..

Now (70) and place it on the layer just behind the bat layer and place at the top a lil off center.

Finally choose Paper (2) and place it on the very bottom layer, choose a mask and make it look like the night sky.
You will need to resize by 150% to make it fit your canvas. 

Almost done....

Merge visible , Re-size to your liking(I like 600x600)then add the artist and your copyrights :) and choose your desired font,
for this I used,CF Zombie Party, which I got as a free font,but sadly do not have the link.. , I used red outlined in black.
Adjust size as desired.

And save as a PNG so that its transparent...

Saturday, October 11, 2014

Bewildered By Wendy G

CT By Michelle's Myths For Wendy G. Graphics
Meet the gorgeous Bewildered, She comes in 4 different colored layers and 
 you can purchase her
at Mystical Scraps here:


 Kit used, Steampunked Halloween,by Michelle's Myths
 
Kit used, Witchcraft,by Michelle's Myths


Kit used, Not All Witches Are Green,by Michelle's Myths


Kit used, Witchcraft,by Michelle's Myths


Thursday, October 9, 2014

Psychosis By Wendy G. Tutortial


This tutorial is completely my own and any similarity is just pure coincidence...


Supplies Needed:

I use PSP X6

Tube of Choice, I'm using in this one,Psychosis by Wendy G., which you can purchase HERE

Scrap Kit: Broken Dolls By Michelle's Myths which you can purchase HERE


Font of Choice I used CF Zombie Party, which I got as a free font,but sadly do not have the link..


Ok Lets get Started...

Open Up a new image, 900 x 900 (this tends to work better when using more elements)

It will look big but you will resize later...

Now choose
Frame (4)
and place it in your new image.


Next I added Psychosis,Customize her to your liking(I chose the full size)and place her in your image.
Place her in front of the frame, re-size if needed.Place her on the left edge of the frame.
Now take the Close Up of Psychosis and place her inside the frame.
Now click on frame layer, and use the magic wand tool, and click inside the frame.Go up to selections, modify, expand, enter 10 in number of pixels,
go back up to selections and click invert. Now click on paper layer, and go up to edit and chose cut.Now go back up and select NONE.
This will remove all excess surrounding the frame.

Now take Paper (1) and repeat the same process as you did with the close up of Psychosis.

Next pick out some more elements, I chose BrokenDolls_MM_GFM (25),BrokenDolls_MM_GFM (30),BrokenDolls_MM_GFM (38),BrokenDolls_MM_GFM (53),
BrokenDolls_MM_GFM (54),BrokenDolls_MM_GFM (66),BrokenDolls_MM_GFM (69),BrokenDolls_MM_GFM (70),BrokenDolls_MM_GFM (71),
BrokenDolls_MM_GFM (76),and BrokenDolls_MM_GFM (77)

Take BrokenDolls_MM_GFM (76),and BrokenDolls_MM_GFM (77) and place one on the top of each side of the frame on the very bottom layer.
Next duplicate and repeat on the bottom.
Now take BrokenDolls_MM_GFM (71) and place on top of the frame on the side opposite to your tube.
Take BrokenDolls_MM_GFM (69) place it on top of (71) and resize by 75% and arrange to your liking,see tag for placement.
Now take (53) (54) and (70)and place in a cluster ontop of (71) and (69), resize (but 71,this can stay the size it already is)
all by 50% as you place them, so that they are not too large.

Next take (66) and resize by 50% and randomly place over the tag to your liking, see tag for my placements.
Duplicate several times and repeat random placement.

Now place (38) over the tube layer but under your (66) layer, if you place as I did.

Take (30) and place over frame in the top corner as if it is draped over the frame.

Take your final element, (25) and place it in the center of your frame at the bottom. Make sure its on the layer just
above the frame.

Now choose BrokenDolls_MM_GFM (60) and place it on the layer just above the blood layers and center it behind the frame
on the left side. Next duplicate and place the copy on the opposite side.
Finally choose (52) and place it behind tree layer on the far right top corner.

Almost done....

Merge visible , Re-size to your liking(I like 600x600)then add the artist and your copyrights :) and choose your desired font,
for this I used,CF Zombie Party, which I got as a free font,but sadly do not have the link.. , I used dark blue outlined in black.
Adjust size as desired.

And save as a PNG so that its transparent...

Friday, October 3, 2014

New Doll With Matching Kit

Meet Selene and her matching kit Witchcraft

Available @ PFD